The information on this page refers to License Statistics v6.13 and newer, which introduced Custom Application monitoring. |
To use Custom Application management, you must:
- Install License Statistics Agent and connect it to the License Statistics server.
- Add one or more Agent groups, if none have yet been added. (Agent groups can also be added on the fly when configuring the application for monitoring.)
- Configure the applications to be monitored, as described in this section.
- Each application requires one license server to be used.
Configuring application monitoring
You can configure applications to be monitored by
Adding a "Custom Application" License Server
or
Using the "Custom Applications" Administration menu option.
The following sections describe each method.
Add a "Custom Application" License Server
One method for adding a custom application to monitor is by adding a license server, as described below.
- Select License Servers from the Administration section in the left navigation pane.
- From the General tab, click the Add button located at the bottom left of the License Servers grid. An Add New License Server dialog opens to allow you to configure the new license server.
- Enter a name for the license server.
- From the License Manager Type drop-down list, choose "Custom Application."
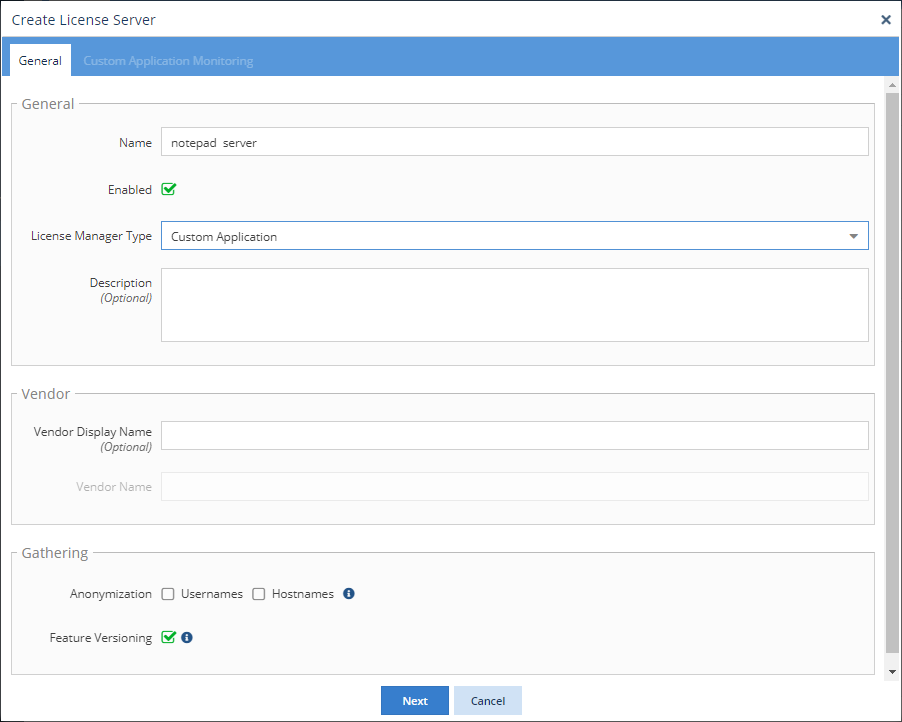
- Fill in the license server settings as needed and toggle the Enable option on/off in the same manner as for other license server types. See Adding and editing license servers for complete information about license server configuration.
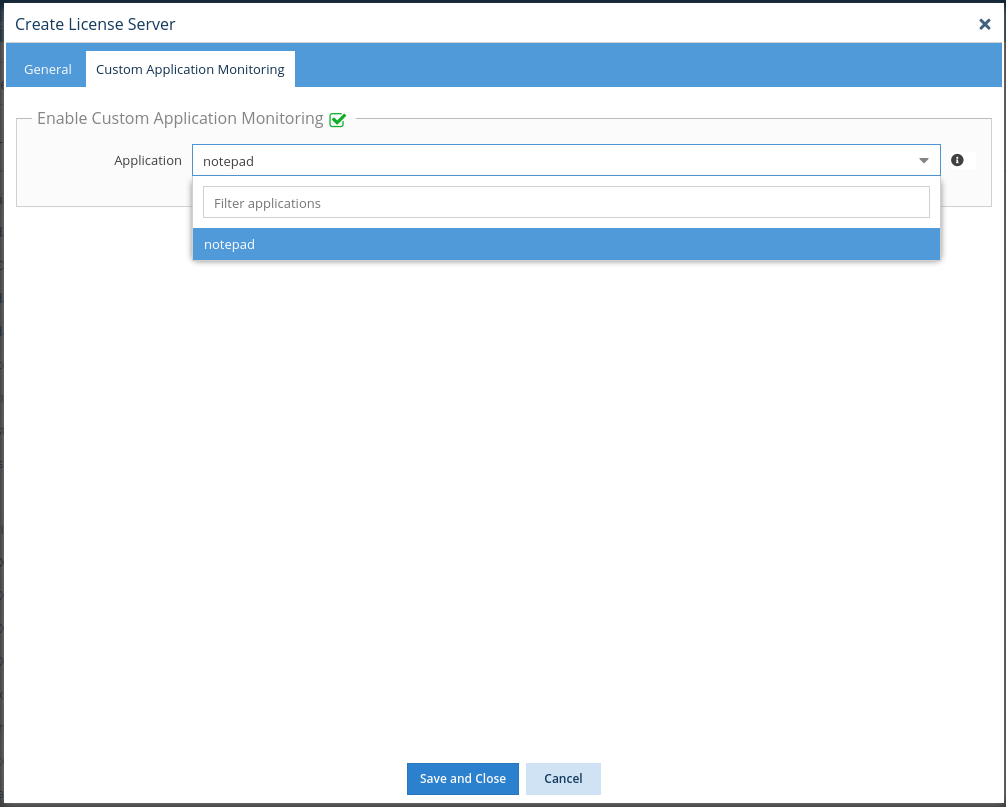
- Click Next to proceed to the Custom Application Monitoring tab.
- The Enable End User Monitoring option is toggled on by default. This option must be toggled on in order to configure custom application monitoring.
- From the Application drop-down list:
- Select an existing application to monitor. In this case, no further configuration is needed, and you can skip to step 11.
Or: - Type the name of a new application to monitor to create a new custom application on the fly. (The application name will be denoted with "(Create New)" if the name you type does not already exist.)
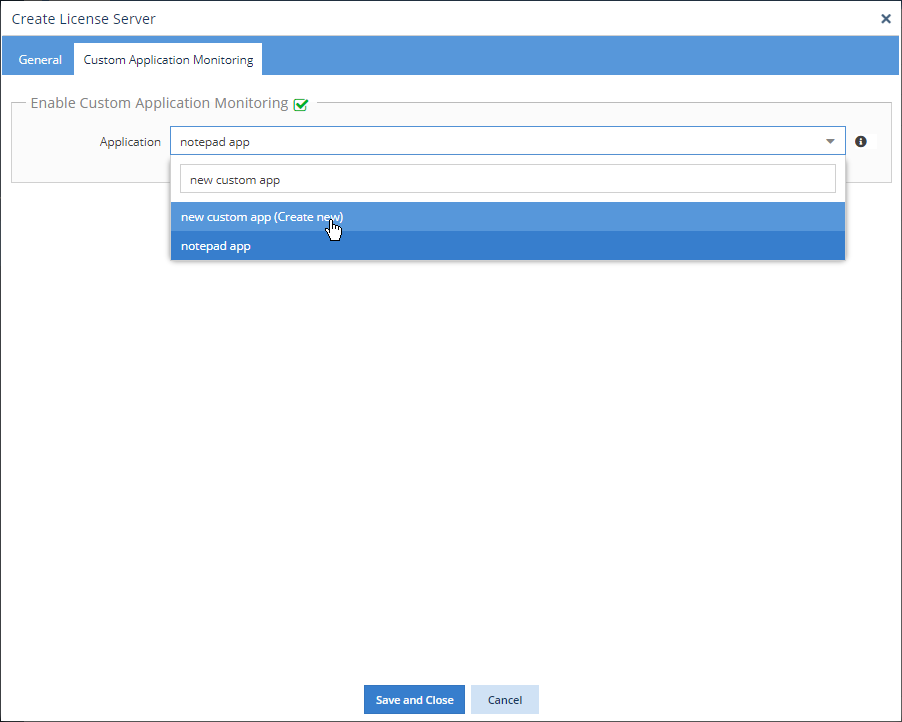
- For a new application, complete the basic configuration information, including the name that you want to use for the application in reports; the executable name; and an optional description.
- When adding a new application, you must also select which Agent groups will be monitoring the application. You can create a new Agent group on the fly by typing the desired name in the Agent Groups drop-down list area and then clicking on the name. (The group name will be denoted with "(Create New)" if the name you type does not already exist.)

- Click Save to close the configuration dialog, and then click Save and Close to add the new License Server and return to the License Servers page.
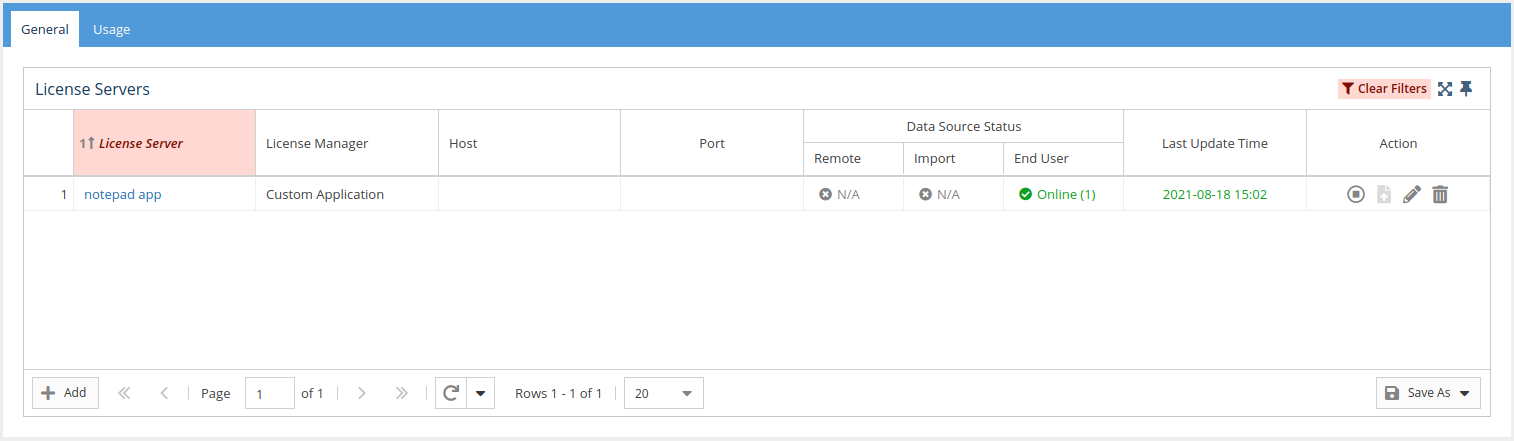
- You will now see under the General tab that the license server with the new application has been added for monitoring.
- Optionally, you can set up License Harvesting for the application.
Use the Custom Applications option from the Administration menu
As an alternative to adding a license server as described above, you can use the Administration menu's Custom Applications option to configure a new Custom Application for monitoring, as described below.
- Select Custom Applications under the Administration section in the left pane.
- Click Add. The Add Custom Application form opens.
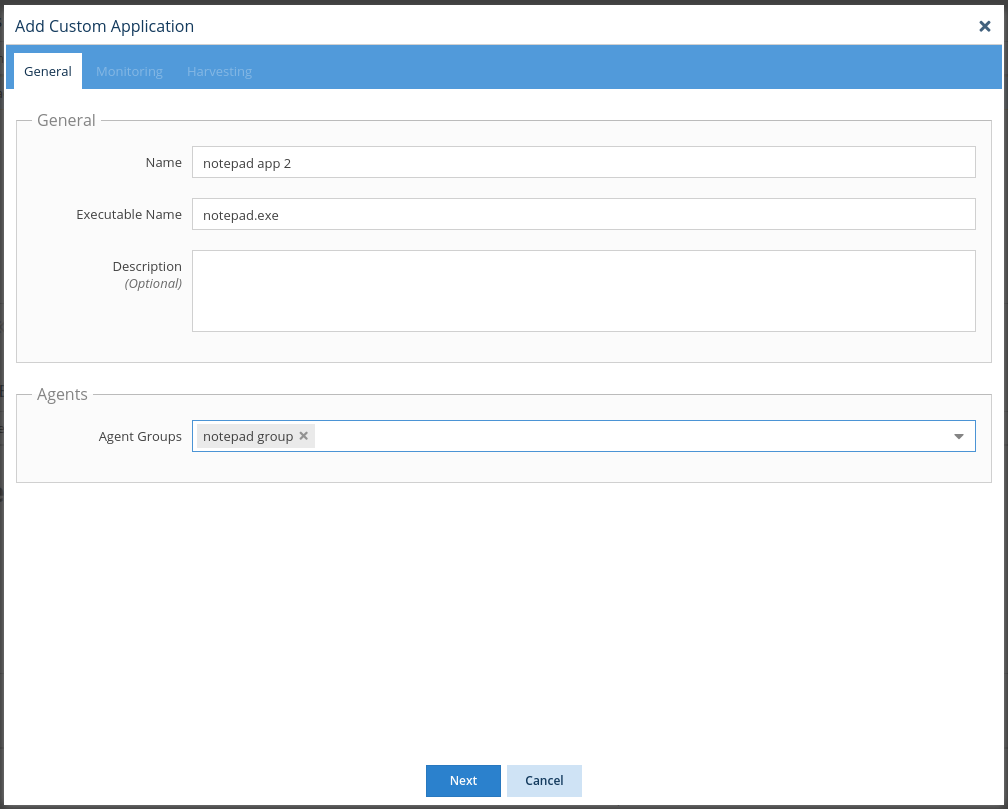
- Fill in the Name and Executable Name fields.
- Select which Agent groups will be monitoring the application. You can create a new Agent group on the fly by typing the desired name in the Agent Groups drop-down list area and then clicking on the name. (The group name will be denoted with "(Create New)" if the name you type does not already exist.)
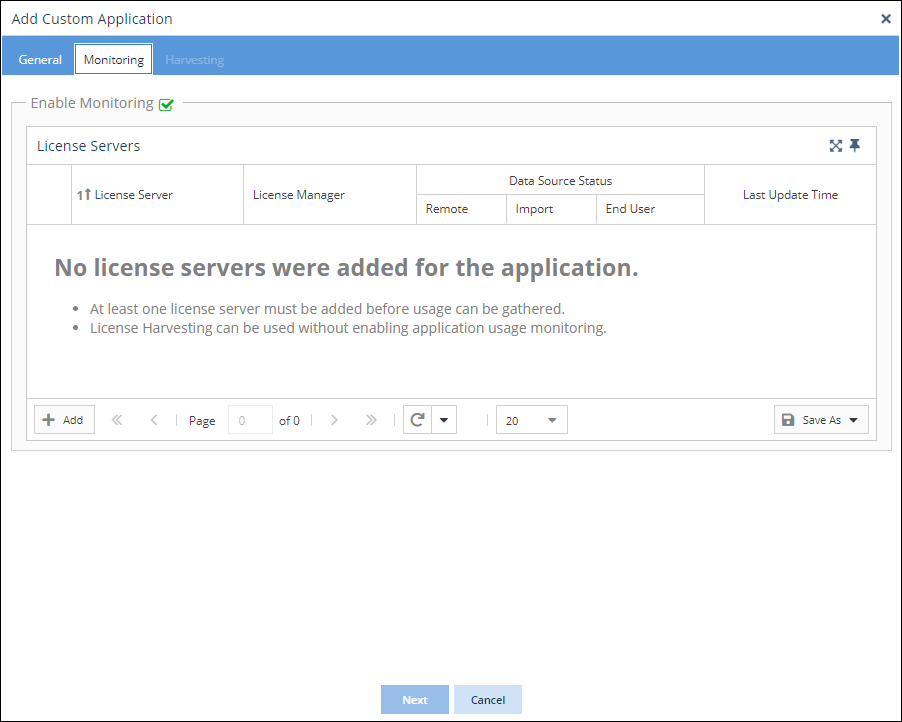
- Click Next to proceed to the Monitoring tab.
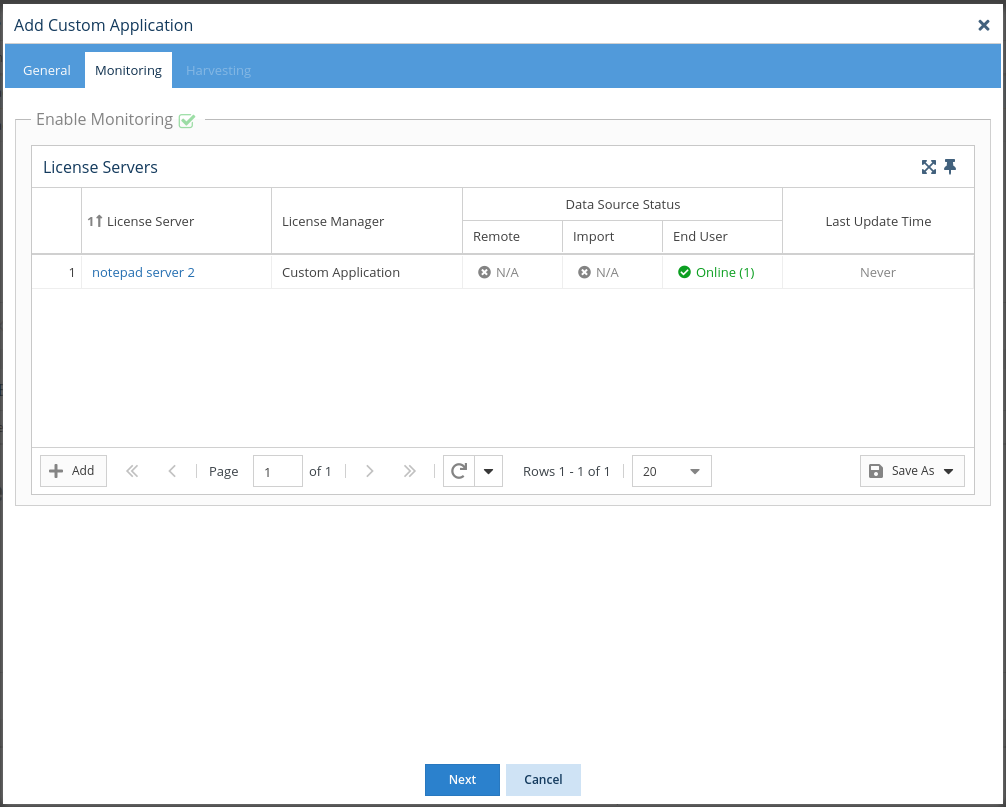
- Toggle on Enable Monitoring. (If Enable Monitoring is not toggled on, the rest of the tab will be blank.)
- Click the Add button in the lower left of the License Servers grid.
- Fill in the form to add the new License Server that will be used by the custom application. (Note: The License Manager Type is automatically set to "Custom Application" and cannot be changed.)
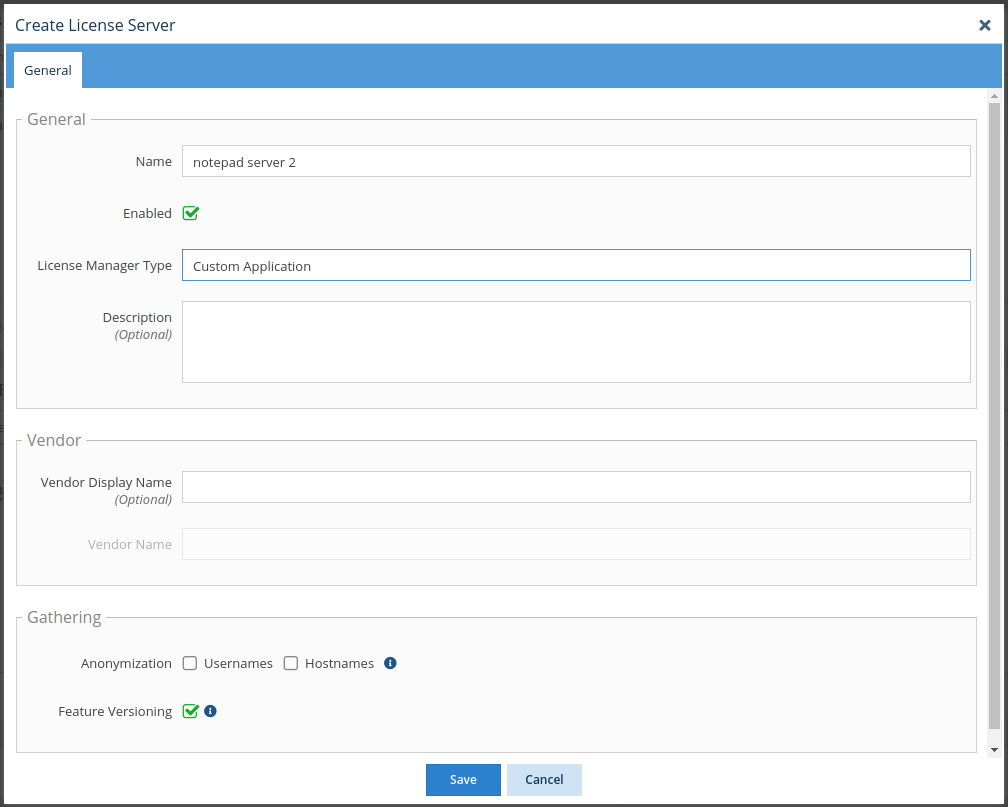
- Click Save to save the license server. You will see that the license server is added to the License Servers grid in the Monitoring tab.
- Click Next to proceed to the License Harvesting tab, and optionally, set up set up License Harvesting for the application.
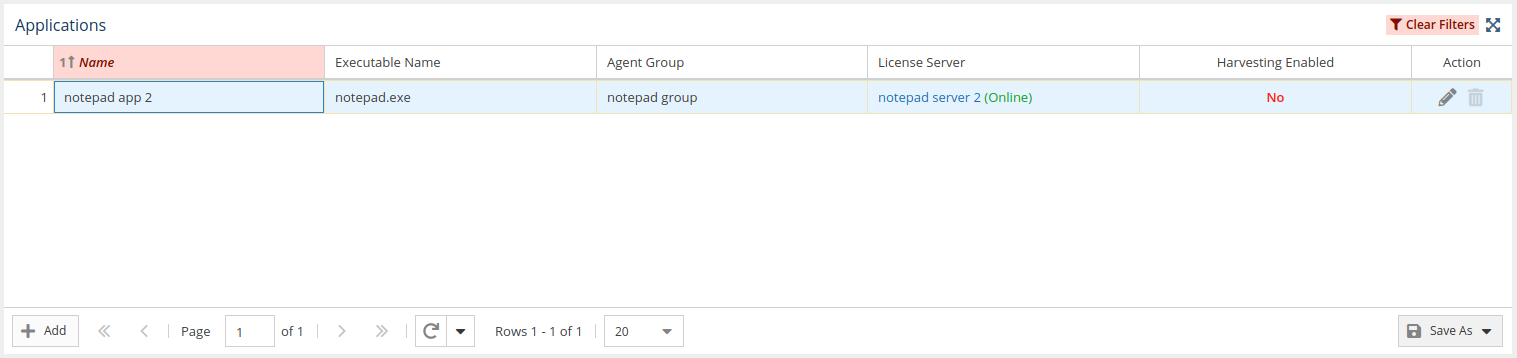
- Click Save to save the configuration and return to the Applications page. You will see that the new application has been created and is included in the Applications grid.