...
The information on this page refers to License Statistics v6.10 19 and newer, which introduced remote session closing for features. License Harvesting may be used only with the new licensing model (2019). added License Harvesting configuration settings to the Custom Applications grid. If you are using a version previous to v6.18, see documentation for previous versions. |
Requirements for setting up Custom Applications
To use Custom ApplicationsTo use Application Monitoring, you must:
- Install License Statistics Agent and connect it to the License Statistics server.
- Add one or more Agent groups, if none have yet been added. (Agent groups can also be added on the fly when configuring the application for monitoring.)
- Configure the applications to be monitored for License Harvesting, as as described in this section.
| Note |
|---|
Each application requires one license server to be used. |
Configuring
...
Custom Application monitoring
You can configure applications to be monitored by:
or
The following sections describe each method.
Anchor lic_server_option lic_server_option
Add a "Custom Application" license server
| lic_server_option | |
| lic_server_option |
One method for adding a custom application to monitor is by adding a license server
...
After you have connected License Statistics Agent to the License Statistics server and added one or more Agent groups, you can configure applications to use License Harvesting, as described below.
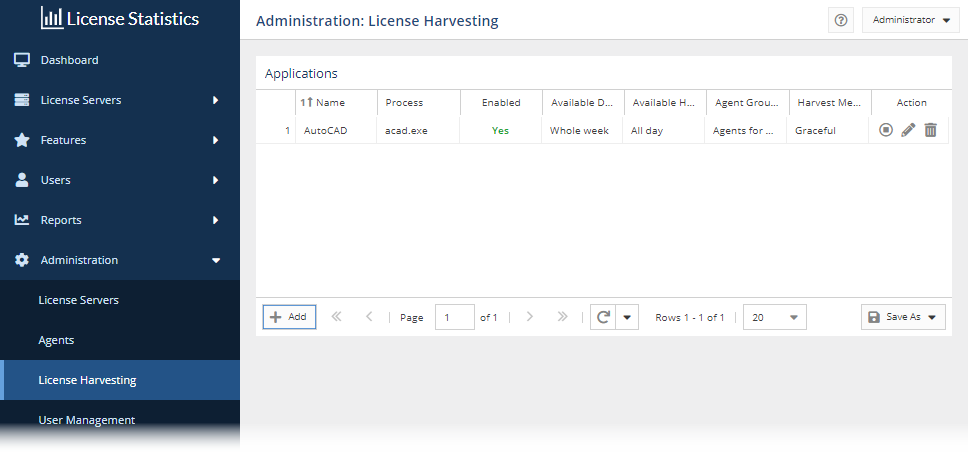
- Select License Harvesting under Servers from the Administration section in the left navigation pane.
- Click From the General tab, click the Add button located in at the bottom left bottom corner of the License Servers grid. The Add Application form opens.
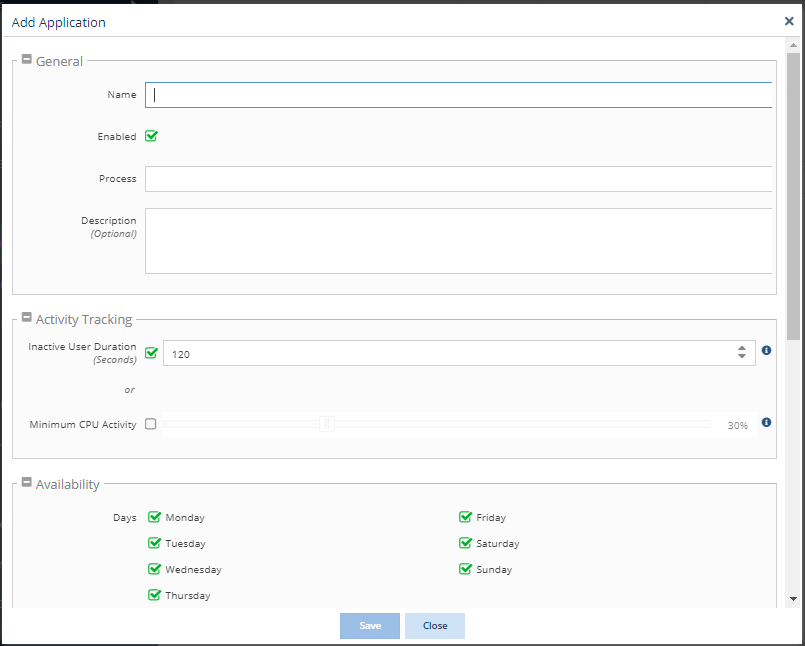
Complete the application configuration settings, as described in the table below.
After the application is configured, click Save at the bottom of the page. You return to the Administration: License Harvesting page.
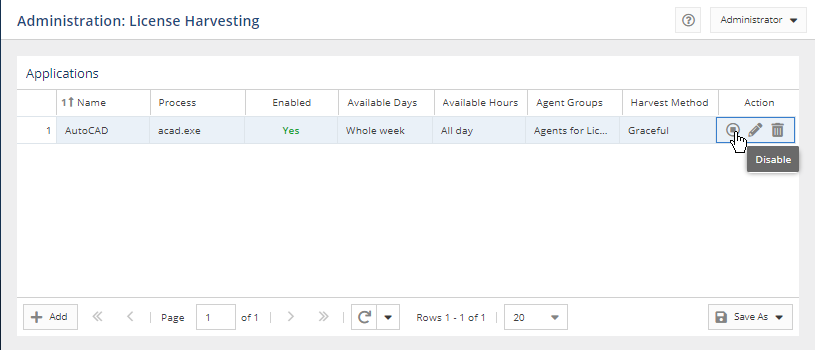
The application will be enabled by default. You may disable/enable the application using the toggle in the row's Action area.
Application configuration settings
The settings for configuring an application for License Harvesting include the following.
...
When toggled on, the maximum amount of time (in seconds) that the application is allowed to be idle (the user is not actively using the application), after which the License Harvesting procedure will begin for that application.
You may either type the number of seconds, or use the increase/decrease arrows to adjust the number of seconds.
This setting may be used alone or together with the Minimum CPU Activity setting.
...
When toggled on, the minimum percentage of CPU usage allowed for the application, after which the License Harvesting procedure will begin for that application.
Use the slider to increase/decrease the percentage.
This setting may be used alone or together with the Inactive User Duration setting.
...
Time range (24-hour clock) that the application is available for use. For example, if you want to limit the hours of usage from 7 a.m. to 7 p.m., you would enter From: 07:00 To: 19:00.
You may either type the time or select it from the drop-down list.
...
When toggled on, when License Harvesting detects that the application is in an idle state, a confirmation message will be sent to the end-user asking them to confirm closing the application.
When this option is not toggled on, the application will be closed immediately with no alert to the end-user.
...
This option may be toggled on only when Confirmation Required has been toggled on.
When this option is toggled on, it sets the time (in seconds) to display the confirmation message to the user, after which License Harvesting will automatically close the application.
When this option is not toggled on, the user confirmation alert will remain on the end-user's machine until the end-user dismisses the alert.
...
Toggle to either Graceful or Forced method of releasing the application license due to idle state.
The Graceful method asks the application to close, but allows the application to wait and remain open if there is user action required to resolve unsaved state questions or confirmations.
The Force method immediately closes the application and ignores any unsaved state questions or confirmations.
...
Applies only when using Graceful release method.
When toggled on, the time (in seconds) to wait for unsaved state questions or confirmations to be resolved, after which the application will be forced to close.
When not toggled on, the application will remain open indefinitely if there are unsaved state questions or confirmations needed.
...
Allows remote session closing for features of applications configured for License Harvesting. When a feature has been enabled for harvesting, after License Harvesting closes an application on the end-user host, License Statistics will automatically force the session to release on the corresponding license server and return the license to the available pool.
This setting is applicable only for LM-X and FlexNet license manager types.
...
One or more Agents groups that will be used to enable License Harvesting for the configured application. The group must already exist.
Configuration scenarios
The following table illustrates combinations of configuration settings that serve end-user experiences ranging from the least to most aggressive handling of license harvesting.
- The most gentle end-user experience (intensity level 1) uses the Graceful release method combined with confirmations that have indefinite wait times.
- The most abrupt end-user experience (intensity level 8) employs the Force release method, which does not allow for any user confirmation/timeout periods.
...
Intensity
...
User Confirmation
...
User Confirmation Timeout
...
Graceful Release Method
...
Graceful Timeout
...
Force Release Method
...
1
...
![]()
...
![]()
...
![]()
...
![]()
...
-
...
2
...
![]()
...
![]()
...
![]()
...
![]()
...
-
...
3
...
![]()
...
![]()
...
![]()
...
![]()
...
-
...
4
...
![]()
...
-
...
![]()
...
![]()
...
-
...
5
...
![]()
...
-
...
![]()
...
![]()
...
-
...
![]()
...
![]()
...
-
...
-
...
![]()
...
7
...
![]()
...
![]()
...
-
...
-
...
![]()
...
8
...
![]()
...
-
...
-
...
-
...
![]()
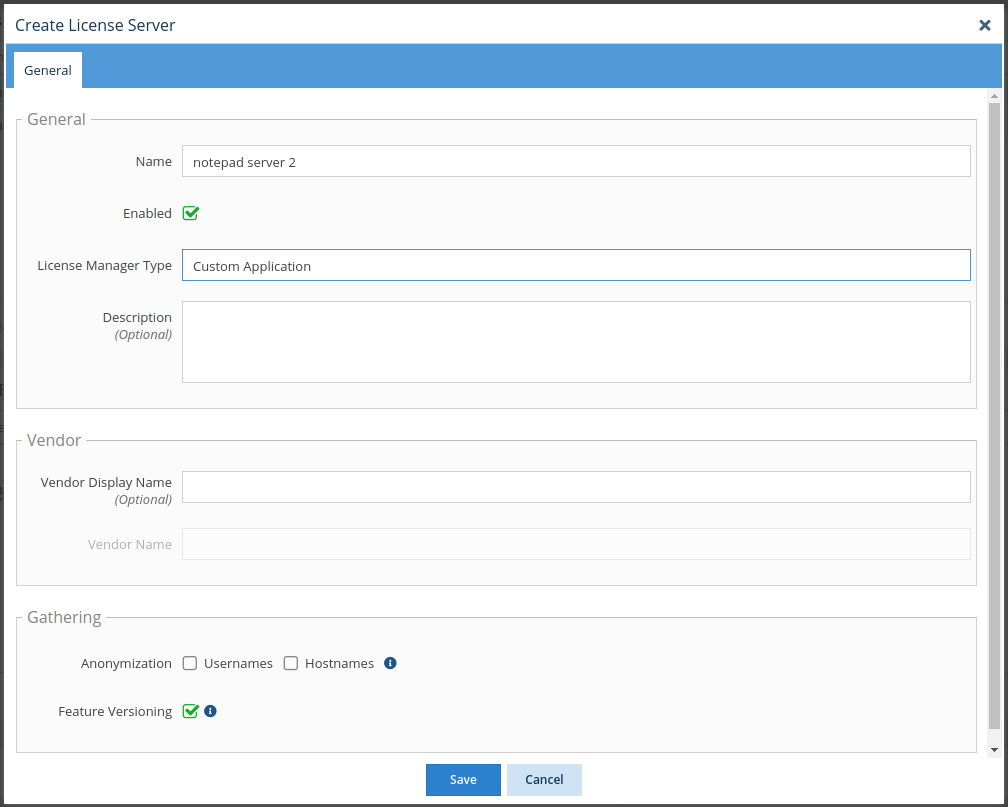
- . A Create License Server dialog opens to allow you to configure the new license server.
- Enter a name for the license server.
- From the License Manager Type drop-down list, choose "Custom Application."
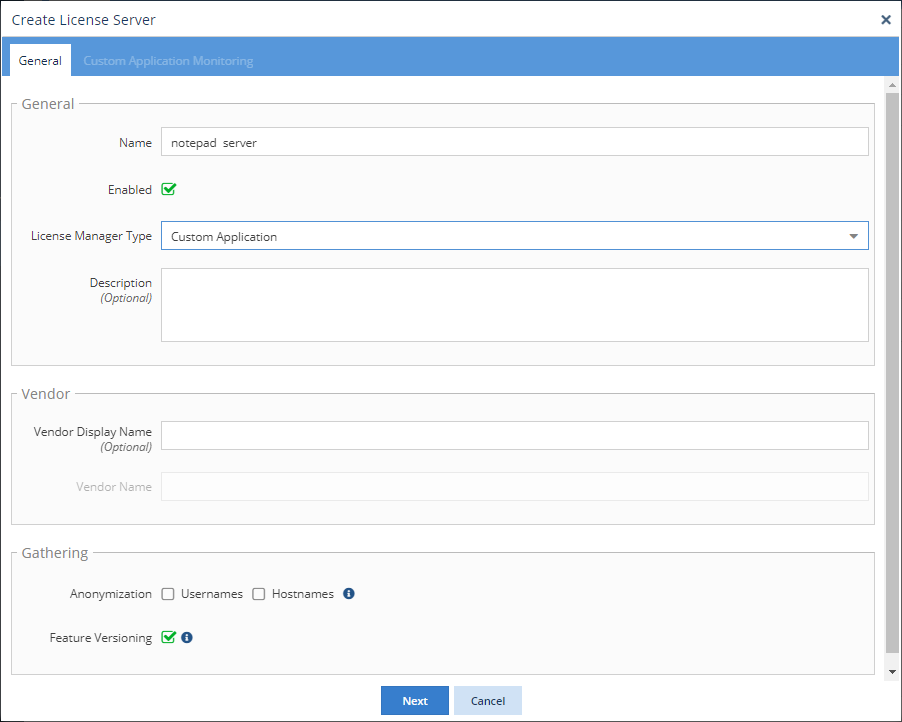
- Fill in the license server settings as needed and toggle the Enable option on/off in the same manner as for other license server types. See Adding and editing license servers for complete information about license server configuration.
- After you have completed all required fields for the license server, click Next to proceed to the Custom Application Monitoring tab.
- The Enable Custom Application Monitoring option is toggled on by default. This option must be toggled on in order to configure Custom Application monitoring.
- From the Application drop-down list:
- If the application you want to monitor already exists, select the application. In this case, no further configuration is needed, and you can skip to step 11.
Or - If the application does not already exist, create a new Custom Application on the fly by typing the name of the new application you want to monitor and then clicking on the name. (The application name is denoted with "(Create new)" when the name you type does not already exist, as illustrated below.)
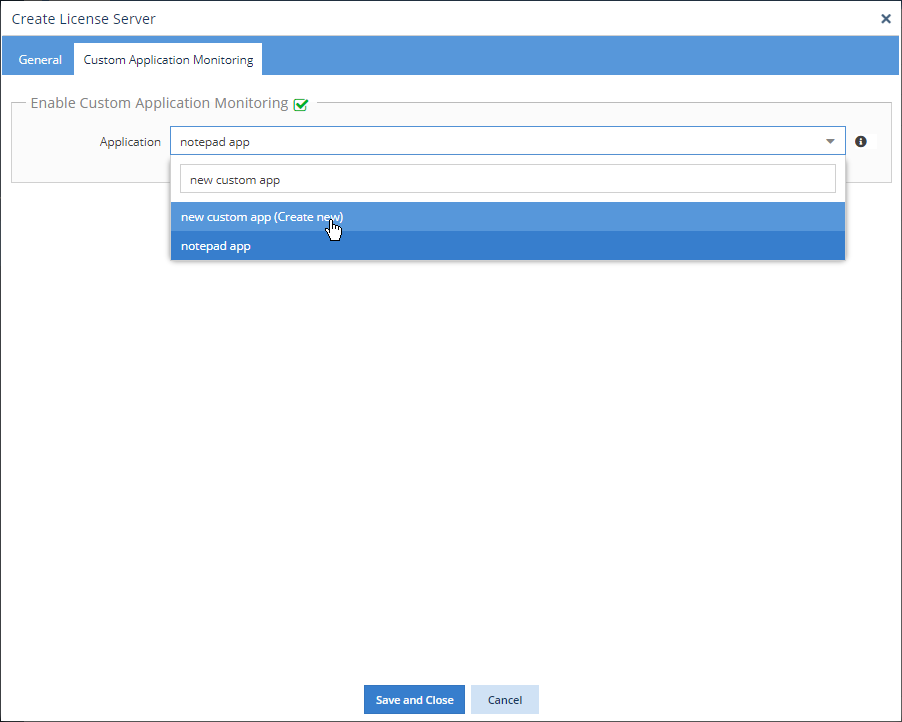
- If the application you want to monitor already exists, select the application. In this case, no further configuration is needed, and you can skip to step 11.
- If you are adding a new application (step 8b):
- Complete the basic configuration information, including the name that you want to use for the application in reports; the executable name; and an optional description. (See How the executable name is used for additional information regarding how executable names are used for Custom Application monitoring.)
- Select which Agent groups will be monitoring the application.
Or - If the Agent group does not already exist, create a new Agent group on the fly by typing the desired name in the Agent Groups drop-down list area and then clicking on the name. (The group name is denoted with "(Create new)" when the name you type does not already exist.)

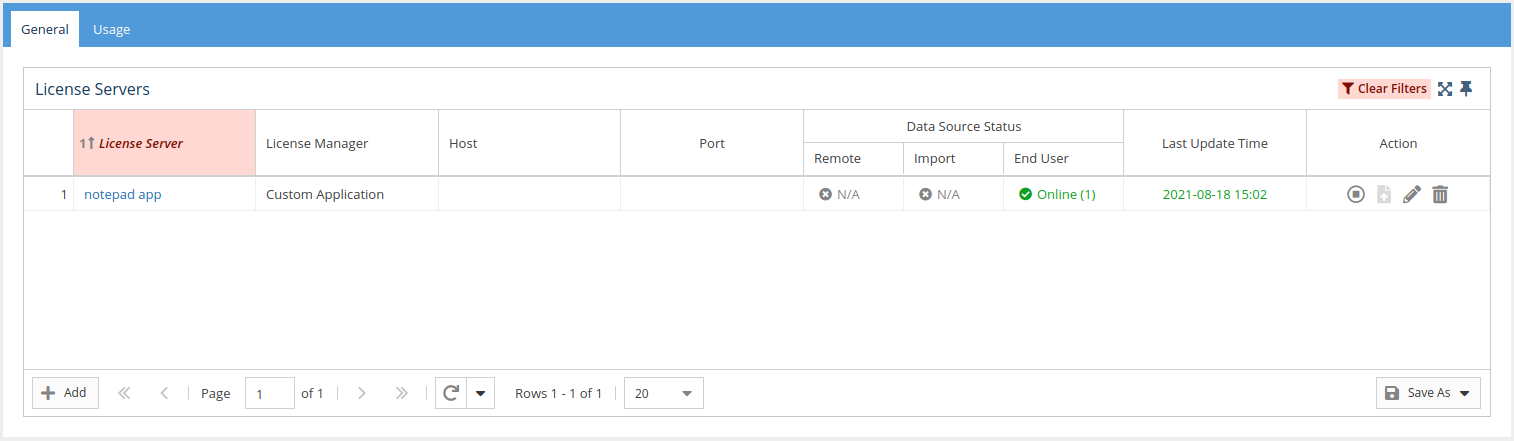
- Click Save to close the configuration dialog, and then click Save and Close to add the new license server and return to the License Servers page.
- In the General tab of the License Servers page, you will now see that the license server with the new application has been added for monitoring.
- Optionally, you can set up License Harvesting for the application.
Anchor custom_app_option custom_app_option
Use the Custom Applications option from the Administration menu
| custom_app_option | |
| custom_app_option |
As an alternative to adding a license server as described above, you can use the Administration menu's Custom Applications option to configure a new Custom Application for monitoring, as described below.
- Select Custom Applications under the Administration section in the left pane.
- Click Add. The Add Custom Application form opens.
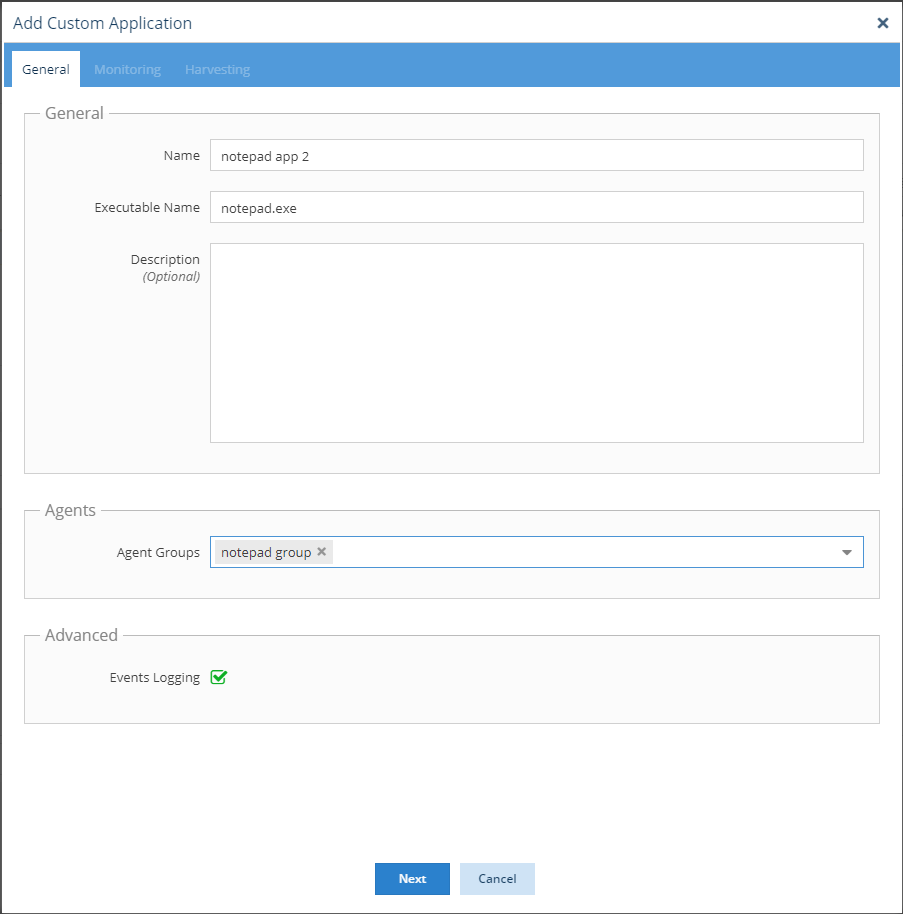
- Fill in the Name and Executable Name fields. (See How the executable name is used for additional information regarding how executable names are used for Custom Application monitoring.)
- Select which Agent groups will be monitoring the application
Or
Create a new Agent group on the fly by typing the desired name in the Agent Groups drop-down list area and then clicking on the name. (The group name is denoted with "(Create new)" when the name you type does not already exist.) - Click Next to proceed to the Monitoring tab.
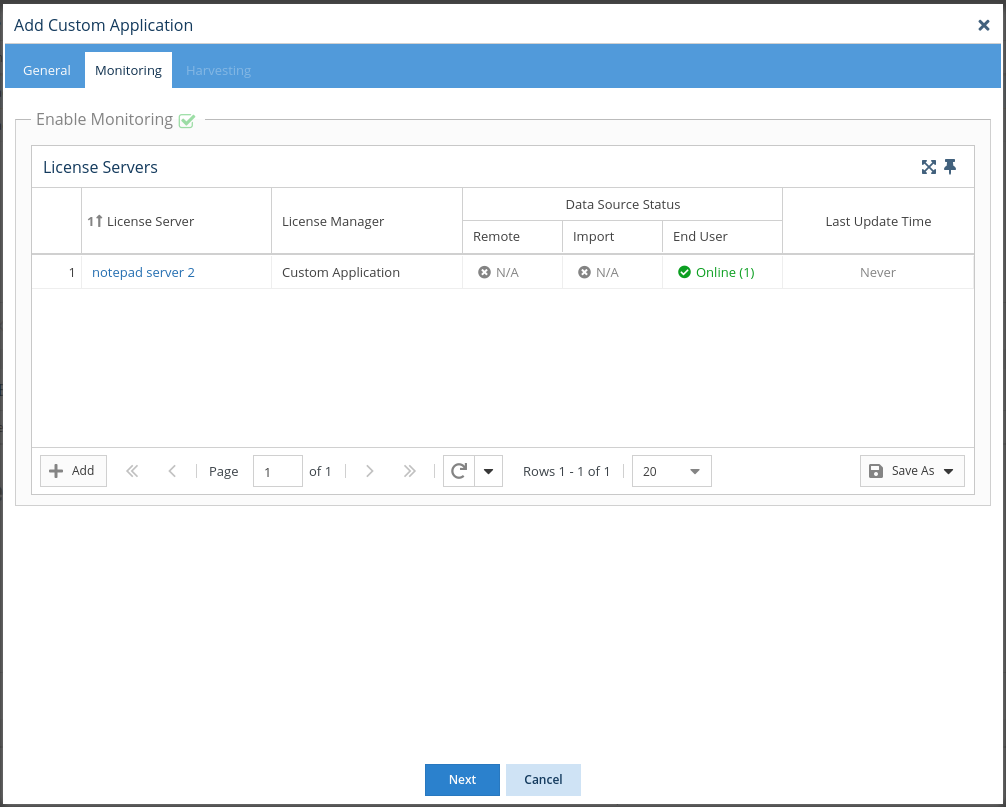
- Toggle on Enable Monitoring. (If Enable Monitoring is not toggled on, the rest of the tab will be blank.)
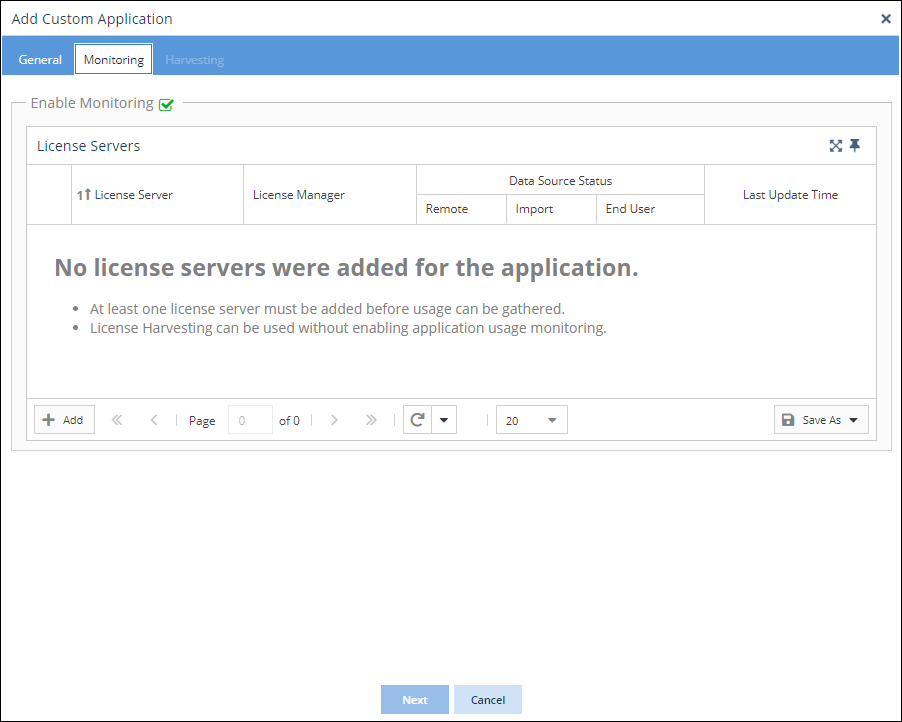
- Click the Add button in the lower left of the License Servers grid.
- Fill in the form to add the new license server that will be used by the Custom Application. (Note: The License Manager Type is automatically set to "Custom Application" and cannot be changed.)
- Click Save to save the new Custom Application license server. You will see that the license server has been added to the License Servers grid in the Monitoring tab.
- Click Next to proceed to the License Harvesting tab, and optionally, set up set up License Harvesting for the application.
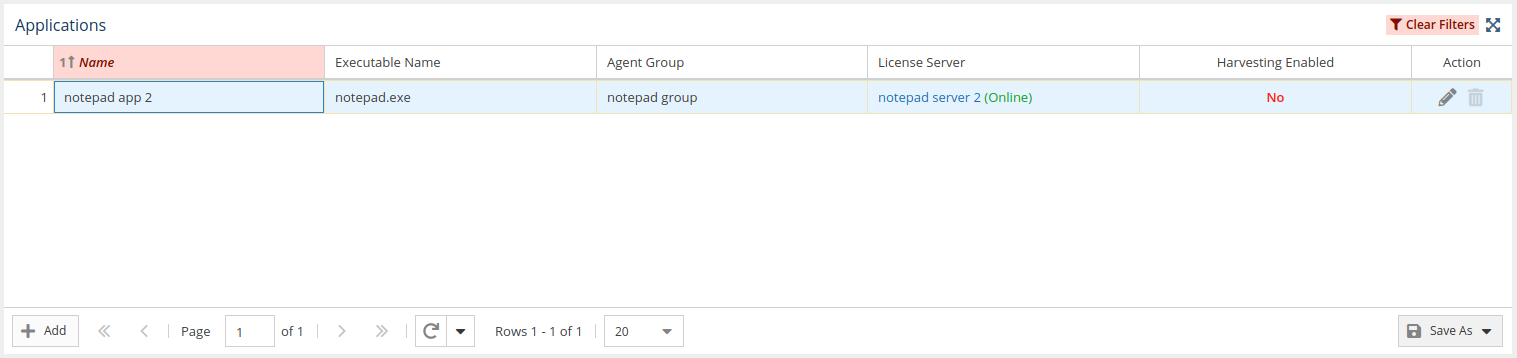
- Click Save to save the configuration and return to the Applications page. You will see that the new application has been created and is included in the Applications grid.
| Anchor | ||||
|---|---|---|---|---|
|
The executable name provided during Custom Application setup (described in the instructions above) is used on the host to detect whether the application is running. The executable name is processed differently, depending on what you enter in this field during Custom Application setup, as detailed below.
- The executable name is not case-sensitive. For example, "NOTEPAD.exe" is processed the same as "notepad.exe".
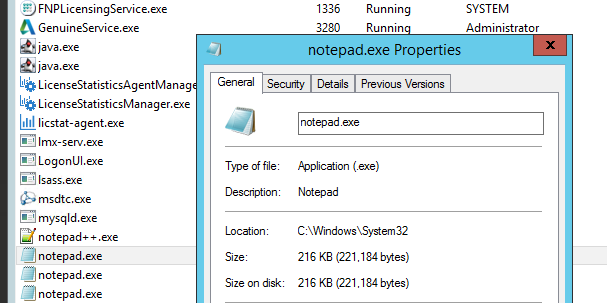
- When you provide the full executable name, the name will match only that specific executable. For example, if you enter the executable name "notepad.exe," it will only match Microsoft Notepad instances and will not match Notepad++ instances, as illustrated below.

- When you provide a partial executable name, it will match any executable name that contains those characters; for example, "app" will match "some_app1.exe," "some_app2.exe," etc. Additionally, note that:
- The applications must have the same vendor; otherwise, monitoring will fail, because License Statistics does not support multiple vendors for a single application
- To monitor multiple processes that have different vendors, you must add each process as an individual custom application with a separate license server
- When you provide a full path for the executable name, it will match only the instances in the explicitly specified path. For example, you can specify the full path "C:\Windows\System32\notepad.exe" as the executable name to specifically monitor only the Microsoft Notepad applications found under that path, as illustrated below.
![]() = enabled
= enabled ![]() = disabled - = not applicable
= disabled - = not applicable
Considerations for using Graceful timeout
The Graceful release method is similar to closing the application using its Close button. For most applications, the Graceful release method results in an indefinite wait for the user to respond to a prompt to close the application. However, some applications may handle the request from License Harvester differently than the Close button, any may perform custom operations or fail to save the current state. Since License Harvester is set up for all applications instead of individual applications (and therefore License Statistics is not able to monitor how individual applications behave), be sure to test results for each application being monitored and apply the correct intensity level for your needs.
If an application does not save the state automatically, consider using intensity level 1, which most closely simulates an infinite popup prompt from the application to save the state, including:
- Prompting the user to close the application, but won't close the application without the user's confirmation
- Keeping the confirmation prompt open with no timeout
- Enabling the user to postpone closing the application or to save the state manually and then close the application
Enabling remote closing for features
You can enable remote session closing for individual features of applications being monitored by License Harvesting.
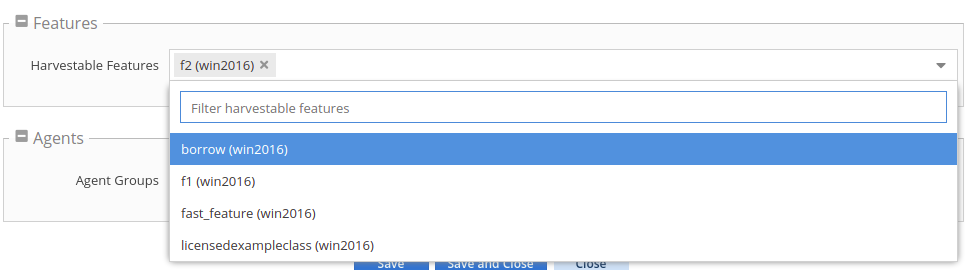
...