...
The information on this page refers to License Statistics v6.0 14 and newer, which introduced a new user interface (UI)schema settings and expanded LDAP support to include LDAP and LDAPwith POSIX, as well as providing support for custom LDAP configuration. If you are using a version previous to v6.014, see documentation for previous versions. |
To access LDAP configuration settings, select LDAP Configuration under the Administration section. (This page is visible only for License Statistics administrator users.) The following sections describe how to configure LDAP using the LDAP Configuration page. Also see Importing LDAP user groups for more details on this topic.
...
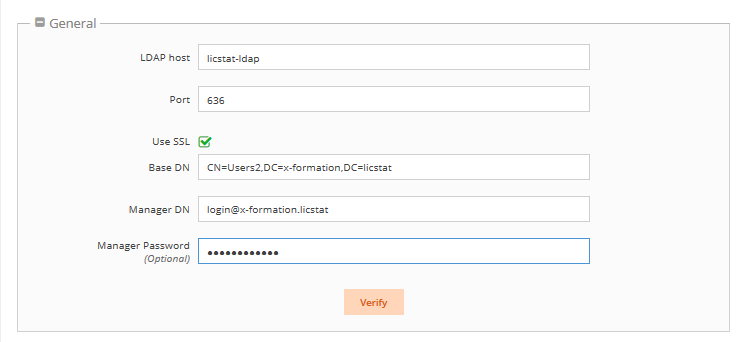
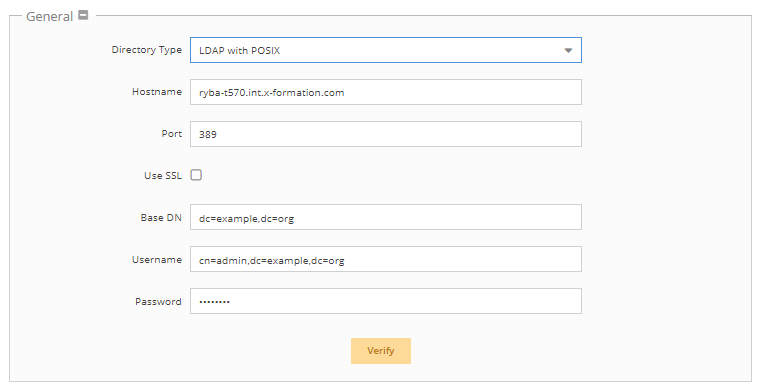
- Enter the appropriate information for connecting to your LDAP server. An example setup is shown in the screenshot below.
- Directory type: Select from Active Directory (default), LDAP, or LDAP with POSIX. Your selection will populate the schema settings with the defaults for that selection, which can then be customized if needed.
- HostameLDAP Host: The hostname of the LDAP server.
- Port: The port for the LDAP server. The default is 389.
- Use SSL: Check this box if you would like to connect to your LDAP server over SSL protocol. If using SSL, see Enabling LDAP over SSL for further setup information.
- Base DN: The base DN (Distinguished Name) under which to search for users and groups. (See Testing LDAP settings for more information on obtaining the base DN.)
- Manager DN: The DN for the manager account to be used for initial binding (authentication).
- Manager Password: The password for the manager account.
- Click Verify to ensure that your connection to the LDAP server works as expected. A message will indicate whether the test was successful. If the test is not successful, make the needed changes to the setup, save the changes, and retest the connection. (See Testing LDAP settings for more information on verifying your LDAP settings.)
- Click Save at the bottom of the LDAP Configuration page to save the LDAP configuration.
...
- Check the "Enable LDAP Users Import" checkbox to enable importing user groups you have defined in an LDAP directory.
- Optionally, you may enter a filter for the import to limit the data that is imported.
- Enter/edit the schema settings if needed for your configuration.
- Click Verify to ensure that your connection to the LDAP server works as expected. A message will indicate whether the test was successful. If the test is not successful, make the needed changes to the setup, save the changes, and retest the connection.
- Click Save at the bottom of the LDAP Configuration page to save the LDAP configuration.
...
- Check the "Enable LDAP Authentication" checkbox.
Optionally, you can enter a filter that limits the accounts that are allowed to authenticate and are automatically created.
Info Default query with empty optional filter and username foo:
Code Block &(objectClass=user)(sAMAccountName=foo)
Query with optional field applied (filter value: memberOf=admin) and username bar:
Code Block &(&(objectClass=user)(sAMAccountName=bar))(memberOf=admin)
Optionally, check the "Enable automatic account creation using LDAP" checkbox if you want to automatically create accounts using LDAP.
Info If "Enable LDAP Authentication" is selected and "Enable automatic account creation using LDAP" is not selected (which is the default), all users that have accounts connected to LDAP will be authenticated, but no new accounts will be created, even if the LDAP credentials are valid.
Similarly, if you disable LDAP authentication, users who have already logged into License Statistics using their Active Directory will retain the ability to use their login, but no new login attempts using LDAP user accounts will be possible.
- Enter/edit the schema settings if needed for your configuration.
- Click Verify to ensure that your connection to the LDAP server works as expected. A message will indicate whether the test was successful. If the test is not successful, make the needed changes to the setup, save the changes, and retest the connection.
- Click Save at the bottom of the LDAP Configuration page to save the LDAP configuration.
...