The following steps are designed to compile LM-X SDK on a Windows machine in 5 minutes or less from a command line and using Visual Studio.
Note: By default, when you install the SDK, Visual Studio opens to let you compile the SDK. We recommend that you use the project files and use the Build, Clean and Rebuild UI actions within the IDE to compile and recompile the SDK. Alternatively, you can compile the SDK from a command line using nmake, as described below.
Compiling the LM-X SDK from Visual Studio
Step 1. Run Visual Studio.
To run Visual Studio, either:
- Run Visual Studio by default by clicking Finish at the end of installing the LM-X SDK on Windows
or - Double-click on the proper Visual Studio solution file", as shown in the following example:

Note: Make sure the config directory includes the license file.
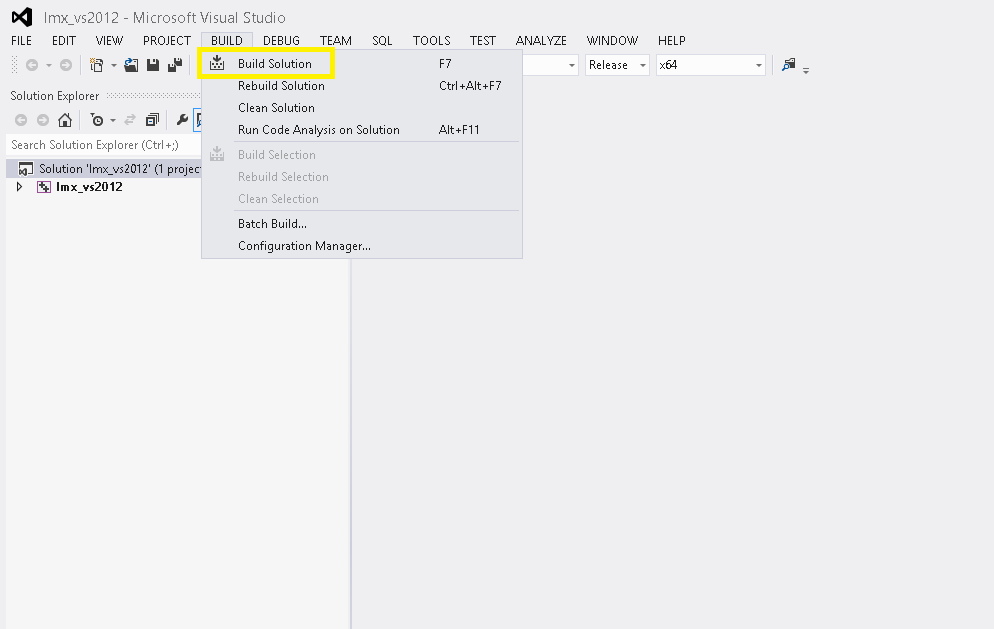
Step 2. Click Build tab and from the list of options that appears, select "Build Solution".
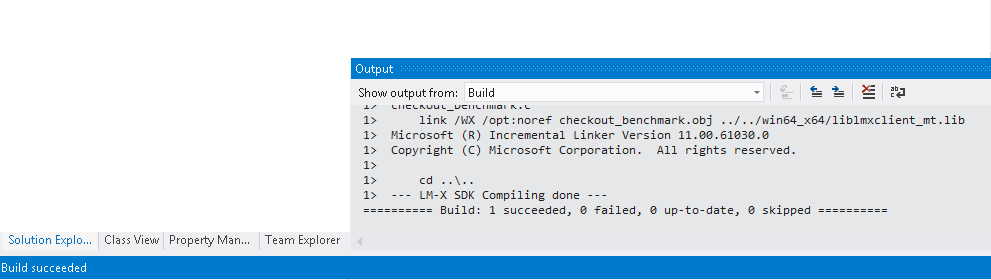
When the compilation is successfully completed, you will see a "Build succeeded" message on the Visual Studio status bar, as shown below.
Compiling the LM-X SDK from a command line
To compile the LM-X SDK from a command line:
Step 1. Run cmd.exe.
Step 2. Set the environment variable.
[screenshot -2]
The following table shows examples of environment variables.
| Visual Studio Version | Script |
|---|---|
| 9.0 | %PROGRAM_FILES%\Microsoft Visual Studio 9.0\VC\bin\vcvars32.bat (Visual Studio 2008 32-bit) |
Step 3. From the root directory of the LM-X distribution, run nmake.
screen 5 - ready-enjoy
See Installation issues for information about problems and workarounds related to compiling the LM-X SDK.