| The information on this page refers to License Statistics v6.24 and newer, which changed "LDAP" labels to the generic label "User Directory." If you are using a version previous to v6.24, please refer to documentation for previous releases. |
For Windows, the User Directory SSL connection is configured using the License Statistics Manager. For Linux, the User Directory SSL connection is configured in the xflicstat.cfg file.
User Directory configuration settings (Windows)
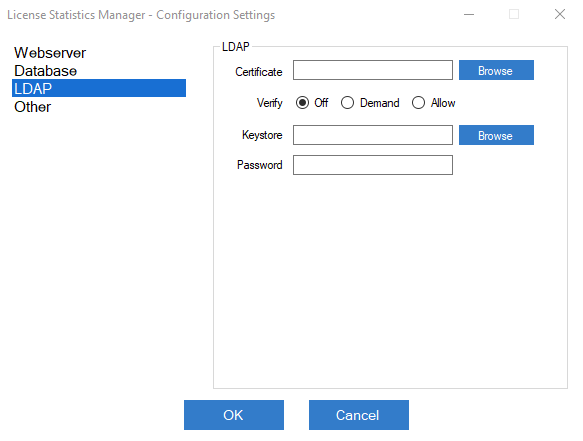
For Windows, use the User Directory section of the License Statistics Manager Configuration Settings to review and modify your User Directory configuration.
User Directory configuration settings (Linux)
The User Directory settings in the configuration file (xflicstat.cfg) include the following.
| Setting | Default | Description |
|---|---|---|
| LDAP_SSL_CERTIFICATE_KEY_FILE | empty | Path to file with certificate. |
| LDAP_SSL_CERTIFICATE_VERIFY | demand | Specifies whether the User Directory server certificate should be verified. To turn verification on, set this to 'demand'; to turn verification off, set this to 'allow'. |
| LDAP_SSL_KEYSTORE | empty | Path to keystore containing server certificate. |
| LDAP_SSL_KEYSTORE_PASSWORD | changeit | Password to keystore. |
Configuration notes
If you need to encrypt only the data sent between License Statistics and the User Directory server, set the certificate verification to "allow." This way, communication will be encrypted, but the User Directory server certificate won't be verified.
If you want to increase security, set the certificate verification to "demand." In most cases, this should be sufficient, because License Statistics has root certificates from most Certified Authorities (CAs) and is able to verify server certificates with them. However, if the server certificate was not issued by one of our supported CAs (e.g., because it was generated from your company's internal root certificate), you will need to provide a User Directory server certificate to License Statistics. There are two ways to do this, as described below.
Method 1: Use the certificate file.
This is the easiest, recommended method.
Windows: Use the Certificate Browse button to select the server root or intermediate certificate file to the License Statistics host.
Linux: Copy the server root or intermediate certificate file to the License Statistics host, and provide the path to this file under LDAP_SSL_CERTIFICATE_KEY_FILE in the xflicstat.cfg file.
LDAP_SSL_CERTIFICATE_KEY_FILE = C:\MyDirectory\certificate.cer
LDAP_SSL_CERTIFICATE_VERIFY = demand
Method 2: Use the keystore with a loaded certificate.
If you already have a JKS or PKCS12 keystore that contains a User Directory server certificate, you can provide the path using this method.
Windows: Use the Keystore Browse button to select the keystore.
Linux: Copy the path to the keystore under the LDAP_SSL_KEYSTORE setting, and enter the keystore password under the LDAP_SSL_KEYSTORE_PASSWORD setting.
LDAP_SSL_CERTIFICATE_VERIFY = demand
LDAP_SSL_KEYSTORE = C:\MyDirectory\keystore.p12
LDAP_SSL_KEYSTORE_PASSWORD = Password123
